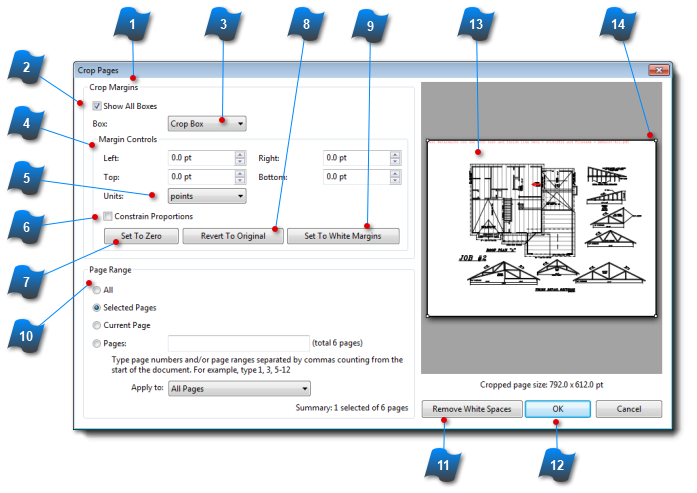
Sometimes you may want to show only a certain region of the page or modify it to a standard size. Use the Crop Pages feature to accomplish this.
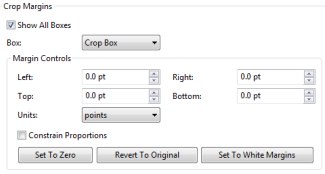
 Crop Margins
This is the area to set the regions and margins of the area to crop.
|
|
 Show Boxes
A check mark here will display all of the boxes (see Box Type) in the main work area. If not checked the main work area will only display the currently selected Box Type.
|
|
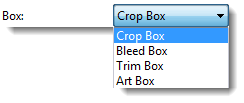
 Box Type
AcroPlot Matrix can define four different Box Types in regard to a PDF.
The Crop Box is the default and is most commonly used.
About Box Types:
A PDF describes the content and appearance of one or more pages. The exact size of that page is not as straightforward as you might think. There can be up to 5 different descriptions in a PDF that relate to its size. These are called the page boxes:
-
The Crop Box defines the region to which the page contents are to be clipped.
-
The Bleed Box determines the region to which the page contents needs to be clipped when output in a production environment.
-
The Trim Box defines the intended dimensions of the finished page.
-
The Art Box can define a region within a page that is of special interest.
-
The Media Box (not used here) is used to specify the width and height of the page. (Actual Page Size)
|
|
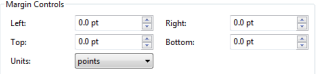
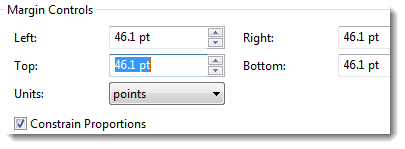
 Margin Controls
Manually set the exact required margins from the edges. Dragging the handles in the work area will display the new margins here.
|
|
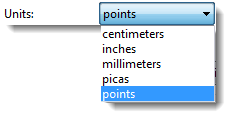
 Margin Units
Set the margin units in any of the displayed choices.
|
|
 Constrain Proportions
Checking this box forces all fields to match the setting for the one being edited.
Note: This rule only applies to entering data into the margin control boxes. Dragging the box in the work area does not follow this rule.
|
|
 Set To Zero
Resets all margin controls to zero. This also works as an Undo function after the page has been cropped and you wish to reset the margins back to show the full page.
|
|
 Reset To Original
This function reverts to the original margins when the Crop Pages dialog box was opened for this cropping session.
Example: Say this page has already been cropped but it's still not quite right. You can open the Crop Page feature again and move the crop box around to adjust the region. If you want to start back with the crop box you started with click the Revert to Original button. If you want to completely undo the whole crop and view the whole page click the Set to Zero button.
|
|
 Set To White Margins
Automatically sets all four margins in to eliminate as much white or blank space as possible around the edged.
|
|
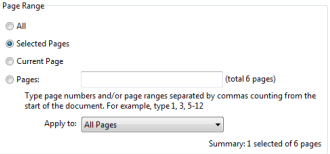
 Page Range
Set the page(s) to be cropped. Multiple pages may be cropped to the same margins at the same time.
|
|
 Remove White Spaces
This function automatically invokes the Set to White Margins feature and closes the dialog box.
|
|
 OK Button
Click to complete cropping.
|
|
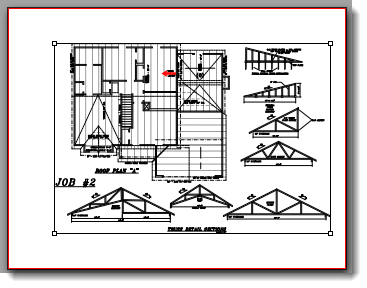
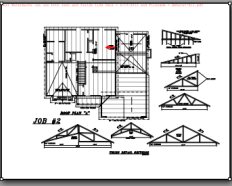
 Work Area
Preview and work area. Drag the handles (little white grips at corners) to define boxes.
|
|
 Handles
The little white grips in the corners are the drag handles. Grab these with the mouse and drag corners or lines to the desired locations.
|
|